When Instagram introduced videos it became an addicting thing, and a whole new door opened up for filmmakers just as it first did to photographers. But things weren’t so smooth, creating quality movies on your phone wasn’t ideal so videos mainly served for dancing cats and concert snippets.
And then Instagram allowed the uploading of the videos from your library, which we thought would bring an on flow of filmmakers either making tiny quality shorts or promoting their films through mini trailers. But the barrage never came, and the quite simple reason is uploading outside videos to your phone isn’t that easy. However, if you’re looking to increase your reach on Instagram, focusing on creating engaging content and connecting with your audience organically can still be an effective way to gain free Instagram followers and grow your presence on the platform.
But what if we told you it’s not that hard?
In fact, if you’ve used a video editing software, and you probably have, creating an #InstaTrailer is an extremely easy process. Here’s how:
This tutorial is done with Adobe Premiere Pro CS6, but can easily be replicated with any other editing software.
One
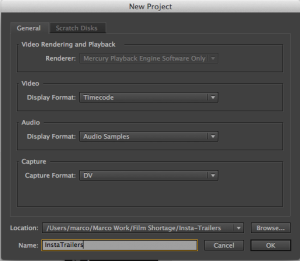
Open Adobe Premiere and create a new Video Project, name it ‘InstaTrailer’ (or any title). Name it something generic, you can use the same project to create all you Instagram videos. Press ‘OK’.
Two
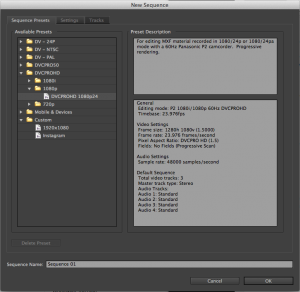
From the ‘New Sequence’ dialogue box, select > Digital SLR > 1080P > DSLR 1080p 30.
If not available, select > DVCPROHD > 1080P > DVCPROHD 1080p24.
Three
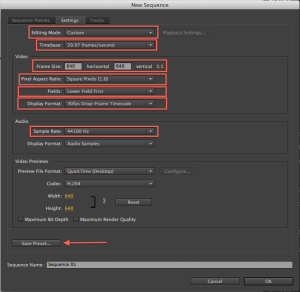
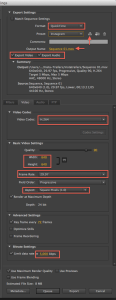
Select the ‘Settings’ tab at the top, and change the settings to the following:
Make sure to save the preset so you can use it easily again later.
Four
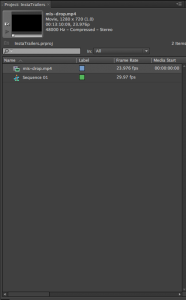
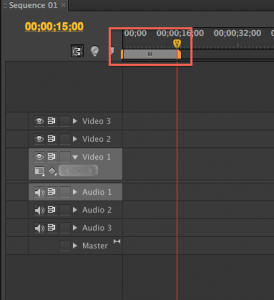
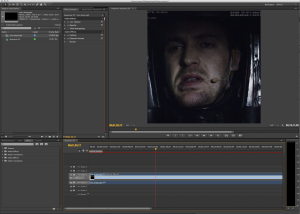
We’re ready to make an InstaTrailer! Import your footage to the project, and then set your project duration to 15 seconds on your timeline.
Five
Drag your video on your timeline, chances are your video will either be too big or too small for the 640×640 Instagram frame. It’s very important to avoid bands and keep the aspect ratio to 1:1 if you wish to give the users the complete Instagram experience, there’s nothing more offsetting than seeing an non-square video or picture on Instagram.
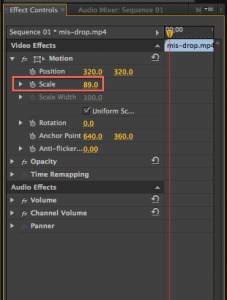
From the ‘Effects Control’ tab, open the ‘Motion’ drop down and play with the ‘Scale’ percentage to increase or decrease the video size. While editing your #InstaTrailer you can adjust the position of your screen shot by shot (you will notice your subject will not always be in frame).
Six
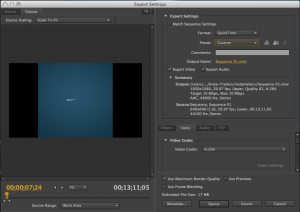
Select File > Export > Media to open up the export dialogue box.
Seven
In the ‘Export Settings’ panel select ‘QuickTime’ for the format and choose any Preset for the moment. Keep ‘Export Video’ and ‘Export Audio’ selected.
In the ‘Video’ tab, change the current settings to the following:
After the changes are made, press the ‘Save Preset’ icon and save your preset as ‘Instagram’.
Select the Output Name and location you wish to save your video.
Eight
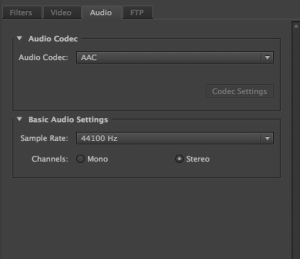
In the ‘Audio’ tab, change the current settings to the following:
Nine
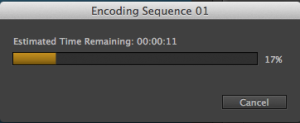
All done! Press ‘Export’.
Ten
Now we have a perfect Instagram video, we just need to send it to your phone. There are a couple of ways, one is to simply send the clip to your email on your mobile phone, and save the video on your library.
Another simple and effective way is to use Dropbox. Simply upload your video to a Dropbox folder.
If you don’t have a Dropbox account, create one here. It’s free and easy!
Eleven
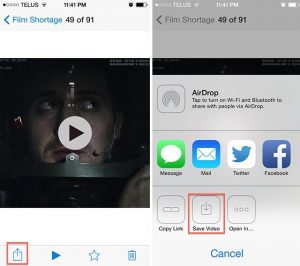
Once uploaded to Dropbox, access your Dropbox App on your mobile phone (iPhone, Android), open your video press ‘Share’ and then ‘Save Video’.
Twelve
All that’s left is to go on Instagram and upload your video!
Remember the few simple rules:
Be square! No filters if you shot it somewhere else, and don’t forget to hashtag #InstaTrailer and mention us in your posts @filmshortage, we would love to see your trailers!


